Avery Templates are a great, go-to office solution when it comes to printing name tags, labels, and other elements. If you are rushing to meet a deadline, rather than hand scoring your prints, you can head over to a Staples or Office Max, pick up a pack, fill out a template, and go print. However, they only offer their templates in Microsoft Word format. This can be limiting when it comes to formatting and flexibility. By porting a skeleton template to InDesign, you can create the template with accuracy while taking advantage of InDesign’s toolset.
This tip takes advantage of the fact Avery creates all of its templates using tables and shapes in Microsoft Word.
The steps are as follows:
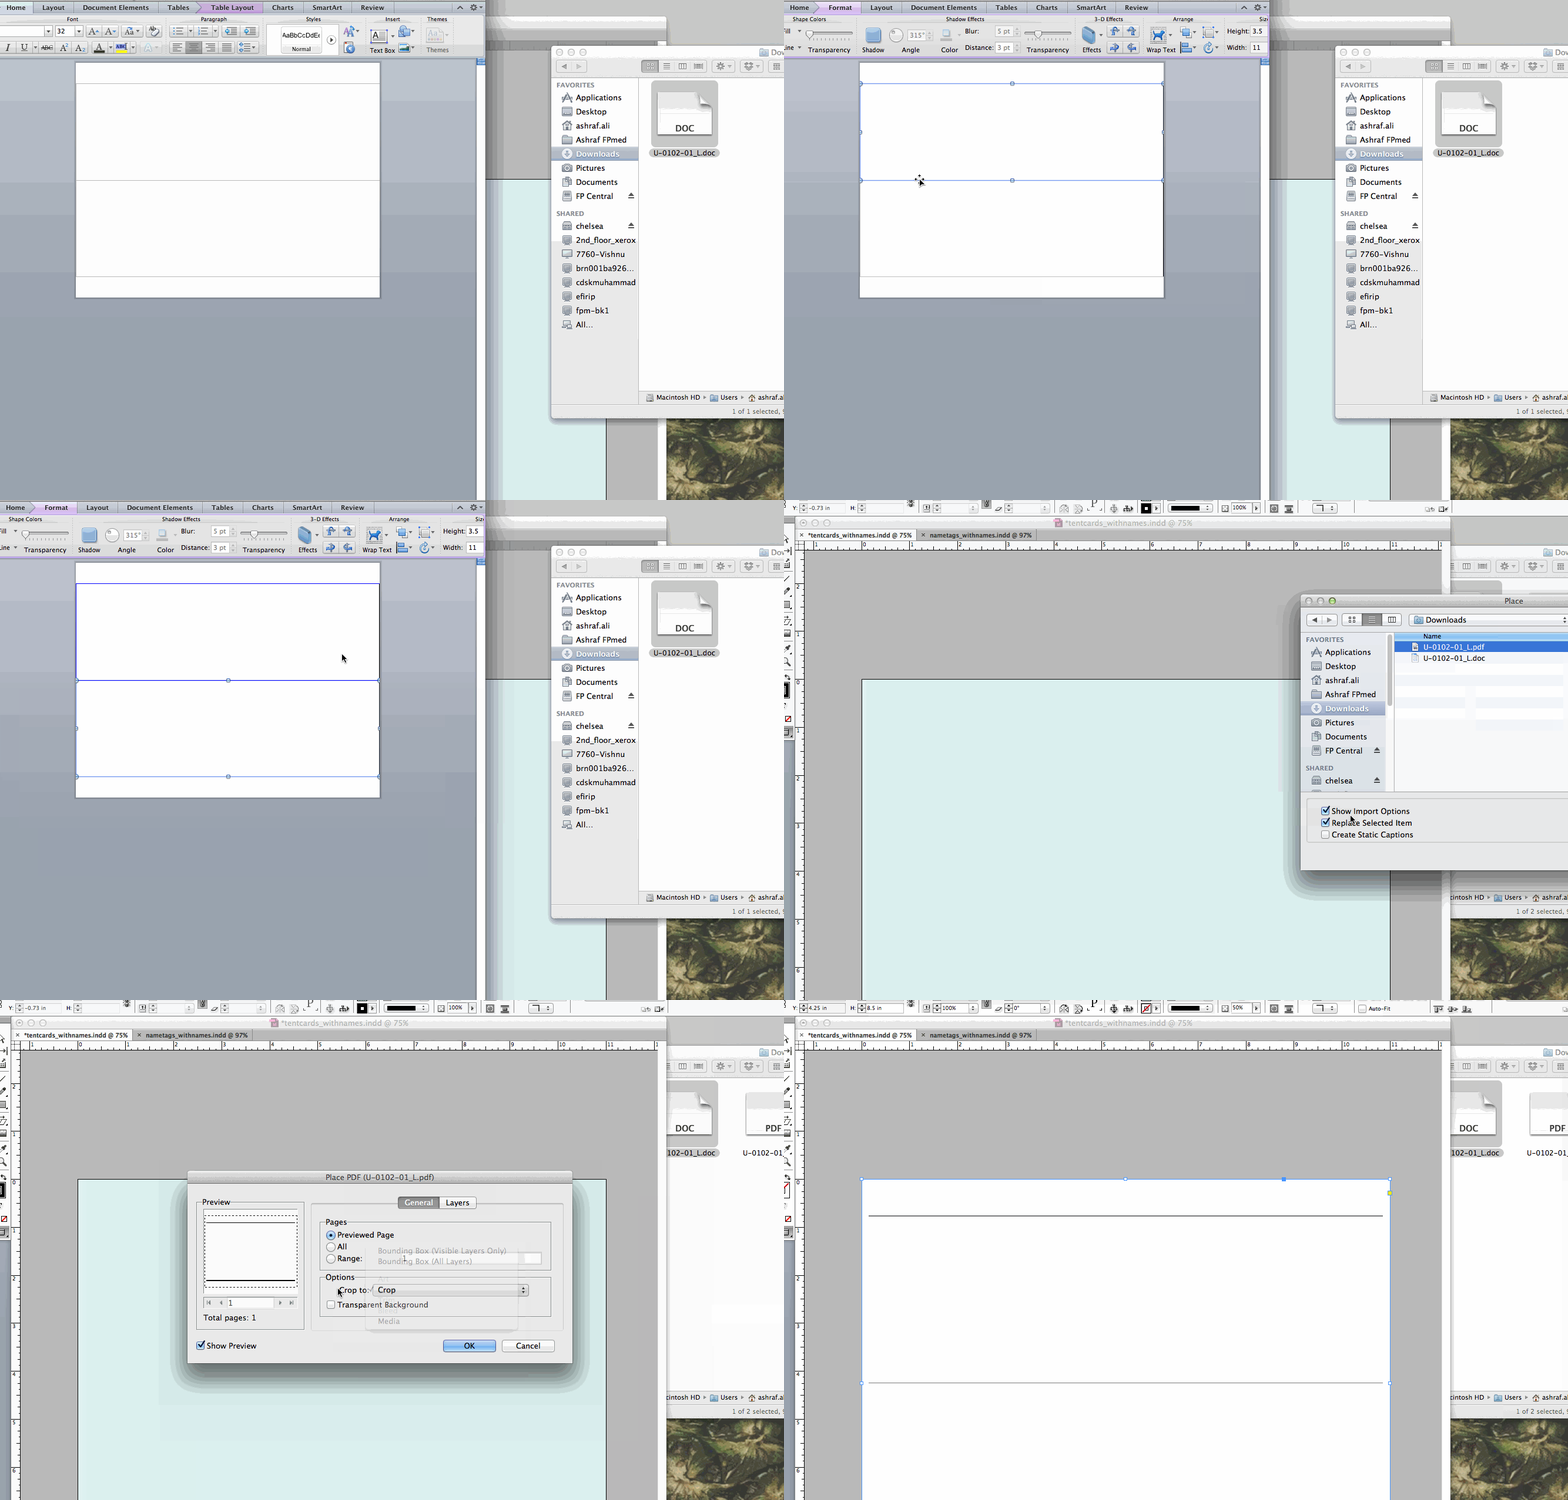
- Download the Microsoft Word template from Avery’s site (unfortunately, I leave you to deal with that usability nightmare)
- After you open the template, select all the elements on the page
- Go to Table > Borders > All
- Individually select on each shape box (select the edge)
- Go to Format > Line and apply a color
- Save the Word Template as a PDF
- Open an InDesign Document with the same size as your template
- Create a new layer called Transparency (this allows you to toggle your preview on/off)
- Place the PDF (CMD + D) and make sure Show Import Options is checked
- Select the Crop to: as Crop. This will maintain the entire page size accurately.
- I prefer to uncheck Transparent Background. This removes the white background on the PDF and leaves the borders.
- Click OK on the dialog box. A little icon should hover next to your cursor. Click ONCE on the template to have the document be placed as the exact size of the PDF.
- Move the document in alignment with your page. You can adjust the opacity if desired.
And there you go! Ready to go. Here is a quick screencast I recorded demonstrating it:
